# Switch views
> Show your workspace as a Canvas, as Windows with tabs and panes, or as a view you install from HiveHub.
Source: https://hivemind.griiken.com/guide/views/
Pick how your workspace looks. Switching
views
keeps every terminal, agent and unsaved edit.
{`
Install a Hivemind view from HiveHub and make sure it loads.
1. Check Hivemind is installed: \`hive --version\` prints a version.
2. Ask me which view I want. Offer these, all on HiveHub: @dip497/constellation (agents in 3D), @dip497/timeline (today's work per agent), @dip497/agents-by-state, @dip497/workspace-map, @dip497/agent-board (notes agents pin), @dip497/code (the workspace as VS Code's workbench, with each frame's code beside its agent).
3. Install it: \`hive plugins install \`.
4. Check: \`hive plugins list --kind view\` shows it with no load error. If it shows an error, tell me the error word for word.
5. Tell me to switch to it in the app with ⌘E / Ctrl+E.
At the end, say which view was installed and that \`hive plugins remove \` removes it.
`}
## Switch views [#switch-views]
1. Press ⌘E / Ctrl+E, or use the view switch in the toolbar.
2. Pick a view.
3. Check: the workspace redraws, and every tile is still running.
You can also pick a view with **Show as** in the Layers panel's title menu.
The view switch's list starts with the workspace you are in. **Switch workspace…** under its name
opens **Open recent**, where you pick another. A view that draws its own toolbar opens the same list.
## Canvas or Windows [#canvas-or-windows]
| View | Best for |
|---|---|
| **Canvas** | seeing everything at once. Frames are coloured areas on one endless surface, and tiles sit inside them. |
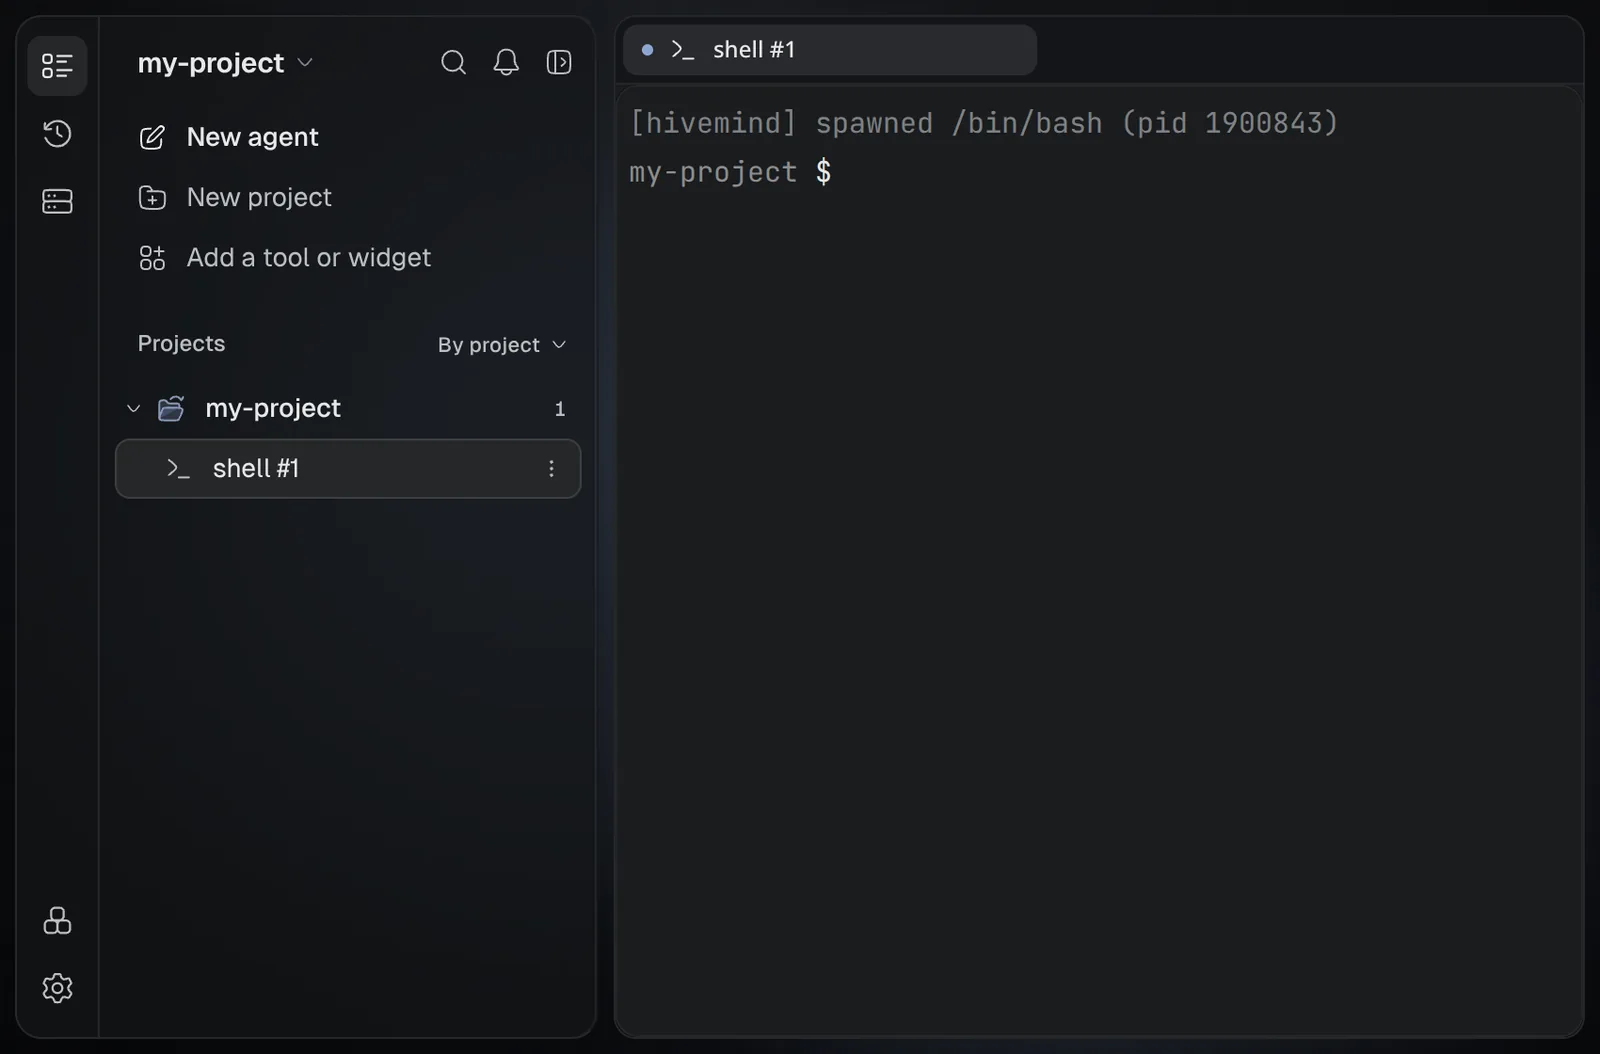
| **Windows** | working in one or two tiles at a time. Tiles are tabs in panes you split, with the Layers panel beside them. Each person keeps their own layout. |
To split a pane in Windows, drag a tab onto a pane's edge, or press `⌘\` / `Ctrl+\`. Every Windows key
is on [Keyboard shortcuts](https://hivemind.griiken.com/guide/keyboard-shortcuts/).
A Browser tile reloads its page once each time you switch views. Its tabs and history stay.
 ## Install a view [#install-a-view]
1. Open **Settings → Plugins** and choose the **HiveHub** tab.
2. Find the view and press **Install**.
3. Check: press ⌘E / Ctrl+E and the view is in the list.
1. Run `hive plugins install @dip497/timeline`.
2. Check: `hive plugins list --kind view` shows it with no load error.
A package that opens with a view prints it, and the app offers to switch to it. The view
brings the package's widgets the first time it shows: see [Packages](https://hivemind.griiken.com/guide/packages/).
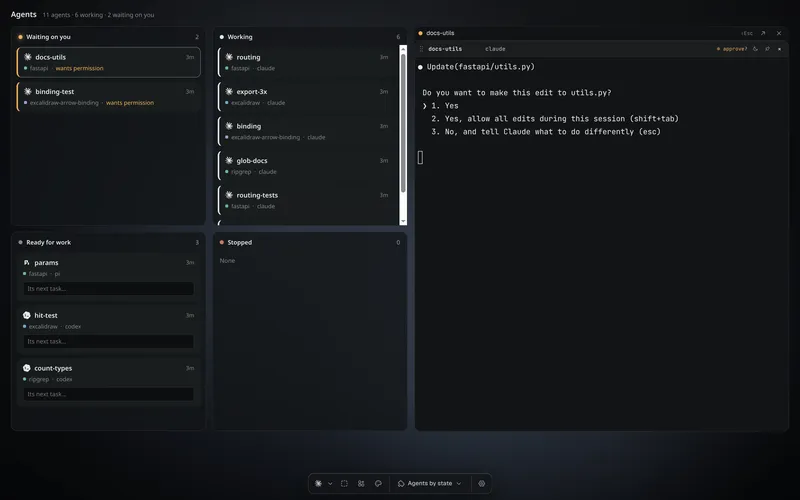 These views are on [HiveHub](https://hivehub.griiken.workers.dev/), as `@dip497/`:
`constellation` (your agents in 3D), `timeline` (today's work per agent), `agents-by-state`,
`workspace-map`, `agent-board` (notes agents pin) and `code` (your workspace as VS Code's
workbench: an explorer, tabs and split editors with live terminals, and each frame's code and
changes watched beside the agent writing them).
A view cannot read your files or use the network. It sees only what its permissions allow. The
app switches it off for the session if it misbehaves. To remove one, run
`hive plugins remove `. To write your own, see [Write a view](https://hivemind.griiken.com/guide/extension-authoring/).
## Set the toolbar [#set-the-toolbar]
The toolbar sits over the view. Each view's page in **Settings → Plugins** sets
**Toolbar → Display**: **Automatic**, **Top**, **Bottom**, **Collapsed** or **Off**.
**Customize actions** picks its buttons. With no toolbar, Settings is at the foot of the Layers
panel.
## If it didn't [#if-it-didnt]
| You see | Do |
|---|---|
| The view is missing from the switch | Run `hive plugins list --kind view` and read its load error. |
| The view shows nothing | It may need a permission. Open its page in **Settings → Plugins**. |
## Related [#related]
- [Workspaces, frames and tiles](https://hivemind.griiken.com/guide/workspaces/)
- [Write a view](https://hivemind.griiken.com/guide/extension-authoring/)
- [Keyboard shortcuts](https://hivemind.griiken.com/guide/keyboard-shortcuts/)